NT4 battery box hack

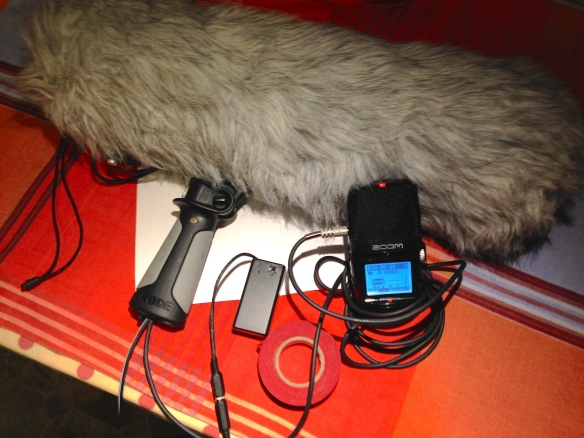
As mentioned in a previous post, I like using the NT4 for location work. I usually use the Tascam DR-680, which has cracking preamps, but often for convenience I use the Zoom H2N, which ain’t half bad. I keep the NT4 in a blimp, but….the H2n doesn’t have P48, which means I have to take the mic out of the blimp to put a 9v battery in. D’oh!

Of course, the mic now needs to be switched on. Once in the blimp, I need to unscrew the front cap, reach in, flick the switch etc. It’s even worse when I have the furry windbreak on – this needs to come off, blimp open, switch, close blimp, furry back on…..oh shit, the recording opportunity has just flown away. Double d’oh!

Of course, once I’ve gone through all that, I’ll invariably forget to switch the microphone off, which means that next time I grab it do do a recording, the battery is flat, which means that the whole mic has to be taken out, by which time the thing I wanted to record has actually died of boredom or old age. D’oh d’oh d’oh d’oh d’oh!

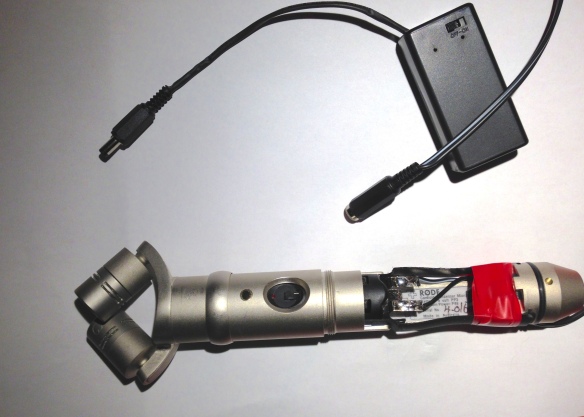
So, kids….here’s a Hack You Can Try At Home!!!! I bought a 9v battery box, a male/female pair of 2.5mm power connectors, a bit of wire and a bit of heatshrink, all for the princely sum of about 7 quid in Maplins, probably much cheaper on Fleabay. I simple soldered wires to the battery terminals in the mic (mind your polarity, and I guess this’ll void your warranty), ran the wire through the cable duct in the mic mount, female terminal on the wire, male terminal on the battery box, plug in, switch on: hey presto, external battery power with a battery that can be switched and changed over without having to take the mic out of the blimp….

I love little mods like this……half an hour work and your life suddenly is a whole lot easier!

nt4blimp

Getting a Rode NT4 to work with a Zoom H2n

I’m a big fan of the diminutive Zoom H2n field recorder, but sometimes the built-in mics don’t cut it. When I plugged it my Rode NT4 (my go-to stereo mic, as it will run on a battery) I found that the output was surprisingly low….turns out that there is a built-in pad in the DXLR to minijack cable, a leftover from when the main portas were minidiscs, which had somewhat hysterical preamps. After a bit of digging around, I found this tip:

nt4bypass

Out came the soldering iron, and now I have full dynamics. Of course if I want decent pre-amps I’ll use my Tascam DR-680, but sometimes you just need to grab something quickly without lugging a kit bag…..

Coding time…..

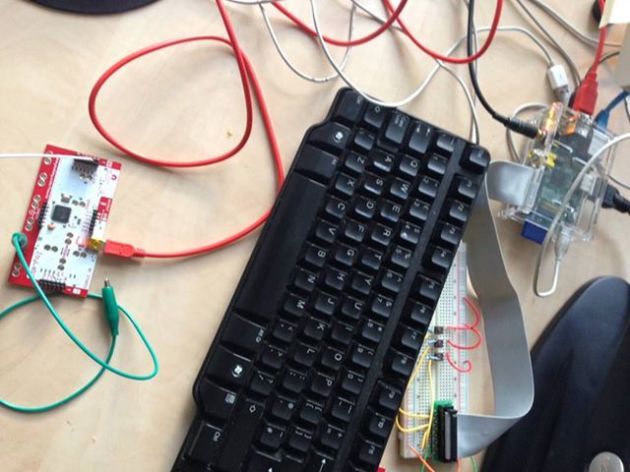
Well, things have progressed somewhat…from a keyboard to a MaKey MaKey was a relatively small step….

Image

After that, I decided that attaching a tiny TFT monitor would be a funky idea…..this opened up a remarkable can of worms, in that the python library I use to read keypresses (PYgame) doesn’t like to run in non-standard resolutions. Anyway…..after a fair bit of digging I got things to work.

374490_10152061660603594_1253841327_n

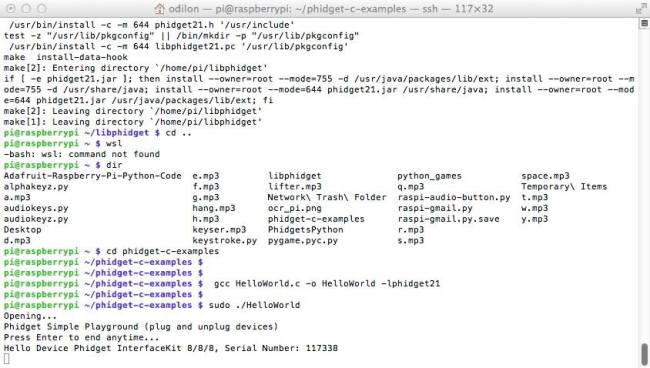
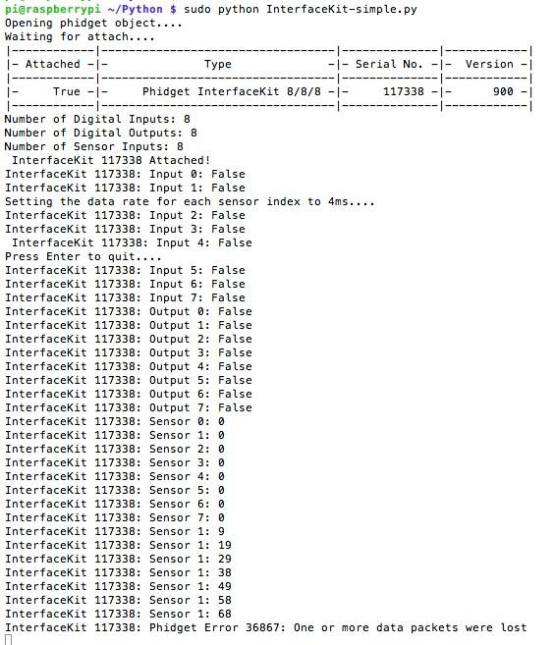
Now then……a challenge. I love my Phidgets (http://www.phidgets.com/), and using the 8/8/8 interface board as an interface to read analogue sensors into the RasPi has great potential. I hadn’t realised that it involved building all sorts of stuff like Python classes, and I even ended up having to dist off some of my old “C” programming skills….but we got there in the end, and the point where my terminal window told me it could see the interface was a fine moment indeed:

Image

and it got even better when I got the Python script to read the sensor inputs working….here is the output from a simple fader:

Image

Some useful links-

Phidgets and Linux: http://www.phidgets.com/docs/OS_-_Linux

Phidgets and C/C++: http://www.phidgets.com/docs/Language_-_C/C%2B%2B

New project!

Right! Time for a new project. This time, children, I have decided to finally do something with my raspberry pi, and I’m delighted to announce that I’ve just cobbled together my first proper bit of Python that allows me to play different sounds by pressing keys on the keyboard. Here ’tis:

import os
import pygame
pygame.init()
screen = pygame.display.set_mode((100, 100))

while True:
for event in pygame.event.get():
if event.type == pygame.KEYDOWN and event.key == 97:
os.system(‘mpg321 hang.mp3 &’)
if event.type == pygame.KEYDOWN and event.key == 115:
os.system(‘mpg321 keyser.mp3 &’)
if event.type == pygame.KEYDOWN and event.key == 100:
os.system(‘mpg321 lifter.mp3 &’)

This borrow heavily from this excellent Adafruit tutorial:

http://learn.adafruit.com/playing-sounds-and-using-buttons-with-raspberry-pi/overview

More soon!

New experiments

A student’s idea prompted me to try this…..I grabbed a cheap little ultrasonic sensor (HC-SR04) and interfaced it with an Arduino, then wrote some code in Max to pull out the serial data and turn it into something musical…..

Here’s the Arduino code:

#define trigPin 12
#define echoPin 13

void setup() {
  Serial.begin (9600);
  pinMode(trigPin, OUTPUT);
  pinMode(echoPin, INPUT);
}

void loop() {
  int duration, distance;
  digitalWrite(trigPin, HIGH);
  delayMicroseconds(1000);
  digitalWrite(trigPin, LOW);
  duration = pulseIn(echoPin, HIGH);
  distance = (duration/2) / 29.1;
  if (distance >= 800 || distance = 0){
    Serial.println(“Out of range”);
  }
  else {
    Serial.print(distance);
    Serial.println(” cm”);
  }
  delay(100);
}

The Max Patch:


And the hardware:

New looks and methods….

Right, been a while since my last update, but Disparate Spaces is still going strong! I’ve done some major redesign, so it now no longer needs the sensors: I found a way of parsing data from Yahoo Weather into the patch, and I’m now using the computers built in camera to get a light intensity reading – it all works really well!
On another note, I’ve now had a listen to what it sounds like in an octophonic diffusion…..a really nice immersive experience. I had some fantastic positive feefback from some of my studemts.